Due Date: March 6

"Flash! A-aaaah! Savior of the Universe" - Queen/1980
Light is the basic building block of all we perceive. Without light we cannot use our eyes. Without light, we have no way of seeing where we are going and no way to observe the world around us. We are unable to distinguish objects near or far, unable to locate a friend in a crowd, or unable to see whether we are headed for a cliff. Without light, we have serious problems. Just like the human eye, light is essential to a camera for it to function at full capacity. In fact, without light, Photography is useless.
Light will encounter a multitude of surfaces. Those surfaces will reflect light in such a way that it appears to us in a very specific manner. Those surfaces range from smooth to gritty, solid to almost a state of liquid. Perhaps it looks prickly, furry, or grainy. Regardless, we refer to these surfaces as "texture". And, becuse of how light "plays" with these surfaces, you can sort of tell how a surface or texture is going to feel long before you personally interact with it.
Please view the Power Point on Lighting and Texture
For this study, the student will shoot a series of images (15 snapshots) that focus entirely on light and texture. It is not the goal to "take a picture" per se, but to build a catalog of different surfaces that may be used for design purposes by another class, the school, or by the photographer themselves. This study also involves the application of light and how it plays with those surfaces. Different color lights will create different effects when it comes in contact with a variety of materials.
Lighting
- All photographs are to be shot in color (no Black/White - Monochromatic).
- All photographs are different scenes/objects/people/etc.
- All images must be Color Corrected
Create a new folder in your Lighting and Texture folder and lable it as "Lighting"- Store these photos in that folder.
-
Lighting (15 pts)
- Diffused Lighting (5 images - Your files are to be named Diffused 1, Diffused 2, Diffused 3, etc.)
- Spot/Directional (5 images - Your files are to be named Spot-Direct 1, Spot-Direct 2, Spot-Direct 3, etc.)
- Backlighting (5 images - Your files are to be named BackLit 1, BackLit 2, BackLit 3, etc.)
For this study, the student will shoot a series of images (15 snapshots) that focus entirely on light and texture. It is not the goal to "take a picture" per se, but to build a catalog of different surfaces that may be used for design purposes by another class, the school, or by the photographer themselves. This study also involves the application of light and how it plays with those surfaces. Different color lights will create different effects when it comes in contact with a variety of materials. And, knowing how/when to use the "flash" function on a camera plays heavily with this study.
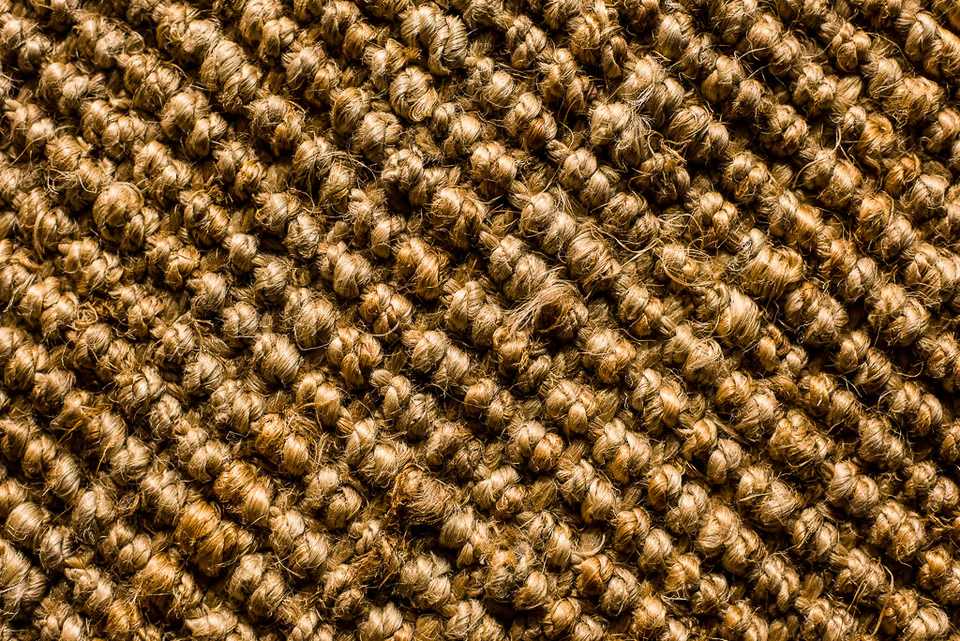
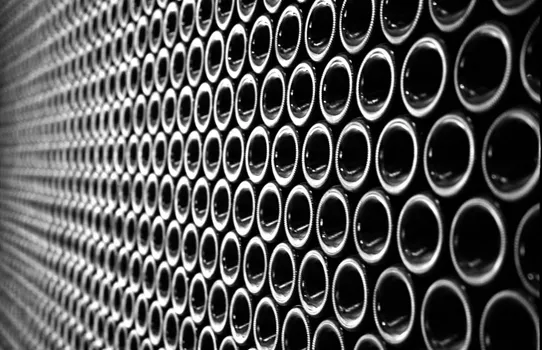
Texture (21 photographs are to be shot in color (no Black/White - Monochromatic).
- All photographs are different textures
- Use the Macro lenses to get really close and aquire the texture of the objects
- All images must be Color Corrected
Create a new folder in your Lighting and Texture folder and lable it as "Textures" - save all of these images in your "Textures" folder.
Textured Images (21 pts)
- Metal - Shiny (3 images) - name your files Shiny 1.psd, Shiny 2.psd, Shiny 3.psd
- Metal - Rusted (3 images) - name your files Rust 1.psd, Rust 2.psd, Rust 3.psd
- Fabric - Rough (3 images) - name your files Rough 1.psd, Rough 2.psd, Rough 3.psd
- Fabric - Smooth/Silky (3 images) - name your files Smooth 1.psd, Smooth 2.psd, Smoother 3.psd
- Stone/Gem/Crystals (3 images) - name your files SGC 1.psd, SGC 2.psd, SGC 3.psd
- Organic/Plant/Soil (3 images) - name your files OGP 1.psd, OGP 2.psd, OGP3.psd
- Food (3 images) - name your files Food 1.psd, Food 2.psd, Food 3.psd
Effects of the Macro Lense